There are several dialogs included with GeoCalc that provide a graphical interface for dealing with the DataSource. The ObjectEditor and DataSourceEditor dialog allows the user to view and modify the DataSource and the objects it contains. The DataSourcePicker and TransformPicker dialogs provide a graphical way to retrieve objects from the DataSource.
In order to compile the code samples contained in this lesson, it will be necessary to include the WDataSource.h, WDataSourceEditor.h, WDataSourcePicker.h, and WTransformPicker.h header files.
Since all of the GeoCalc dialogs require access to a DataSource object, we will start by creating and loading a DataSource and its associated DataView. For more information about using the DataSource, see lesson 4.
DataSource * dataSource = 0;
dataSource = DataSource::CreateDataSource();
dataSource->LoadFile(BMG_T("c:\\bmg\\geocalcpbw\\data\\geodata.xml"), BMG_T("C:\\bmg\\GeoCalcPBW\\data\\geodata.xvw"), true, BMG_T("C:\\bmg\\GeoCalcPBW\\data\custom.xml"), 0, 0, 0);
The ObjectEditor allows the user to edit a single object definition. Depending on the signature of the methods used, this may be either an object within the GeoCalc DataSource, or a specific instance of an object, such as a brand new AngularUnit, or one that was retrieved from the DataSource with a call to GetAngularUnit.
The ObjectEditor dialog is used by the GeoCalc Picker and Editor dialogs to display or edit the properties of an object. For example, when you double-click on a definition in the DataSourceEditor dialog, an ObjectEditor dialog will be displayed. There are many cases where displaying this single item dialog would be required in our application. The following code demonstrates just how this would be accomplished:
ObjectEditor * objEditor = 0;
objEditor = ObjectEditor::CreateObjectEditor(dataSource, DataSource::ProjectedCoordSysType);
objEditor->Show();
This will create an ObjectEditor allowing the user to create and edit a new ProjectedCoordSys. It is also possible to construct an ObjectEditor that will modify an existing object in the DataSource. To do this, we would use the alternate signature of the ObjectEditor constructor which allows us to specify the issuer and code of the existing object. A third variation of the ObjectEditor constructor allows us to pass in an instance of any Serializable object that is not already in the DataSource. Here is what an ObjectEditor for a ProjectedCoordSys looks like:

At the top of the dialog there are two tabs, "Identification", and "Definition". In the above image we are looking at the definition tab for a Transverse Mercator type ProjectedCoordSys. The "Identification" tab contains the information that is common to all Serializable objects, such Name, Remarks, and Identifiers. The "Definition" tab contains the information that is unique to the specific kind of Serializable object. Each object type has its own distinct display in the "Definition" tab when displayed in the ObjectEditor.
In our sample ProjectedCoordys above, all of the parameters that define the ProjectedCoordSys can be viewed and edited. For example we could view or edit the "Area of Use" by clicking on the "i" button next to the "Area of Use" field, or select a different AreaOfUse from the DataSource by clicking on the "..." button. The parameters that define the Projection can also be edited by entering values in the "Value" fields of the table at the bottom. In many cases the parameters also have units that can be modified with the "Units" button in the second column of the Parameter table.
If the user clicks "OK", the dialog will be closed. In the case where the dialog was created with either a brand new object, or with an issuer and code identifying an object in the DataSource any changes made in the ObjectEditor dialog will be saved to the in-memory DataSource. In the case where a object was passed in to be modified, the user will have specified in the constructor whether changes should automatically be saved to the in-memory DataSource. In either case, if a save is attempted some checks will be performed to ensure that the values in the ObjectEditor define a valid object. If an inconsistency is found the user will be presented with a dialog describing the issue, and the ObjectEditor will remain open. In order to make the changes permanent, the DataSource will need to be saved to a file. See Lesson 4 for information about saving the DataSource to file. If the user clicks "Cancel", the dialog will be closed, but no changes will be made to the DataSource.
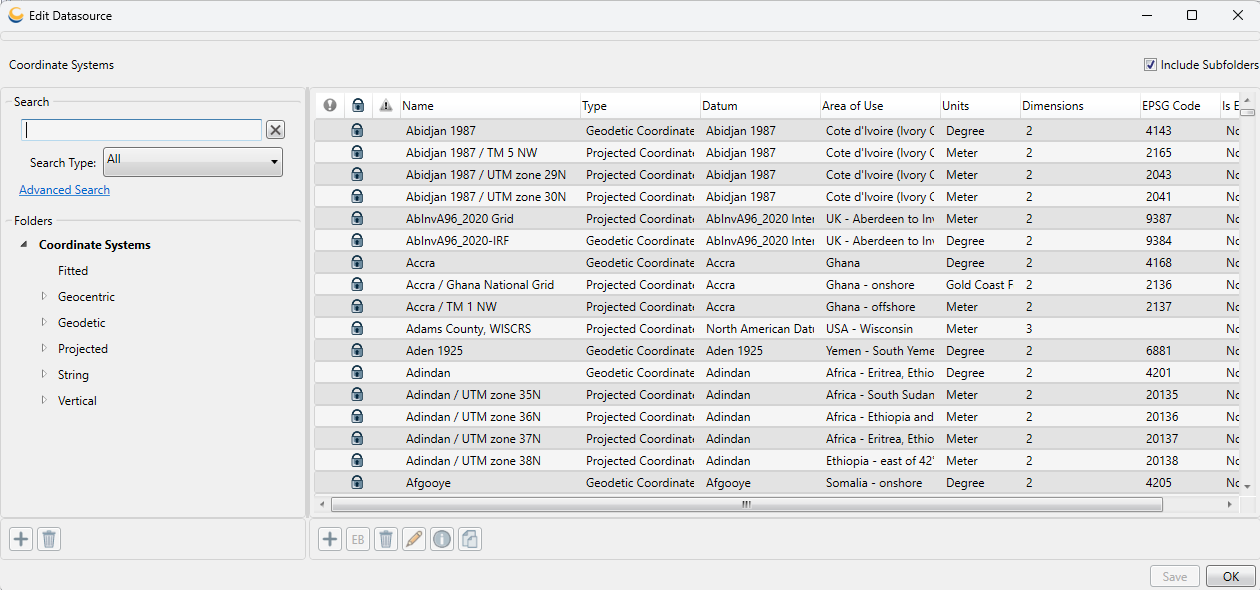
The DataSourceEditor dialog provides the ability to view, edit and search the objects in a DataSource. In order to create a DataSourceEditor class, we must provide an instance of the DataSource and a list of the object types that will be edited by the dialog. The dialog is displayed when the Show method is called. The following lines of code will instantiate and display a DataSourceEditor that will allow our user to browse and edit all of the definitions in the DataSource:
DataSourceEditor * editor = 0;
editor = DataSourceEditor::CreateDataSourceEditor(dataSource, GeoBase::NoType);
editor->Show();
This will display a DataSourceEditor that can be used to browse and edit any Serializable Object type that is contained within the DataSource. This is what we will see when the dialog is launched:

The Show method will return when the user closes the DataSourceEditor dialog. There are several signatures for the Show method. For all instances that allow the user to select an object, an EDialogState variable is returned. If a valid object was selected, it will be returned when the user clicks OK.
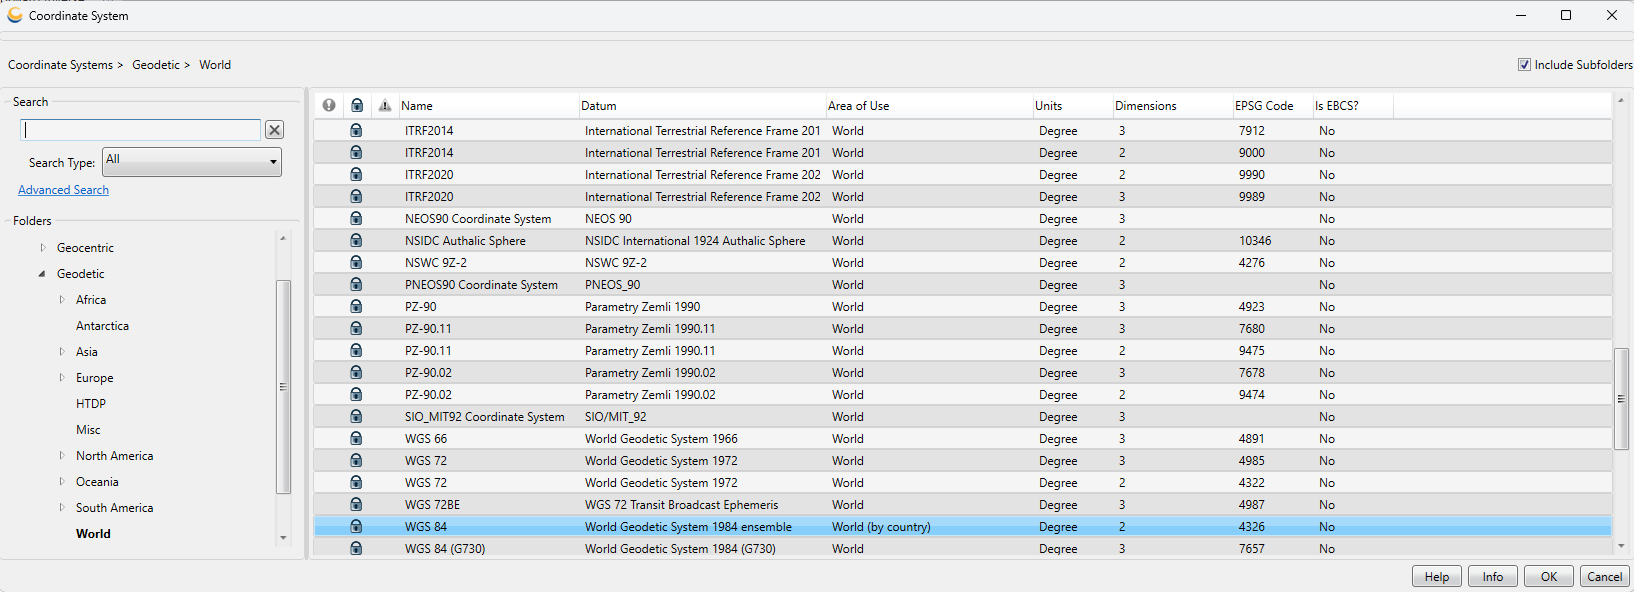
The DataSourcePicker dialog provides is very similar to the Editor interface that we were just looking demonstrating. It provides a detailed organization of the data based on the underlying ViewFile associated with the referenced Datasource object. In order to create an instance of the DataSourcePicker class, one must provide an instance of the DataSource and the type of the object that we will be used to selecting. The dialog will then be displayed when the Show method is called. The following lines of code will instantiate and display a DataSourcePicker that will allow the user to select from several CoordSys definitions:
Serializable * dataSourcePickerSelectedObj = 0;
DataSource::ObjectType objType = (GeoBase::ObjectType)(GeoBase::GeodeticCoordSysType |
GeoBase::ProjectedCoordSysType |
GeoBase::GeocentricCoordSysType |
GeoBase::FittedCoordSysType |
GeoBase::StringCoordSysType);
DataSourcePicker * picker = 0;
picker = DataSourcePicker::CreateDataSourcePicker(dataSource, objType);
EDialogState retVal = picker->Show(&dataSourcePickerSelectedObj);
This will display a DataSourcePicker dialog that can be used to select a CoordSys from the DataSource. Once you compile and execute the above code snippet, you should see this:

If the return value of the Show method is eDialogStateSuccess, then an object was successfully selected by the user, and the dataSourcePickerSelectedObject parameter that was passed into the method now holds a pointer to that object. If the user closes the dialog without selecting an object, then the return value from the Show method will be eDialogStateCancel.
This dialog will be described in-depth in Lesson 6: Selecting Transforms.
A "Help" button is available to all Dialogs. It is enabled when a URL is assigned through the set_HelpURL method. To disable and hide the button, set the URL to an empty character string. By default, no URL is assigned to the "Help" button so it is hidden in each Dialog.
Finally, we must clean up after ourselves and free the memory that we have allocated in this lesson using the Disposal::Dispose method:
if(objEditor) Disposal::Dispose(objEditor);
if(editor) Disposal::Dispose(editor);
if(picker) Disposal::Dispose(picker);
if(dataSourcePickerSelectedObj) Disposal::Dispose(dataSourcePickerSelectedObj);
if(dataSource) Disposal::Dispose(dataSource);