Seismic Survey Formats
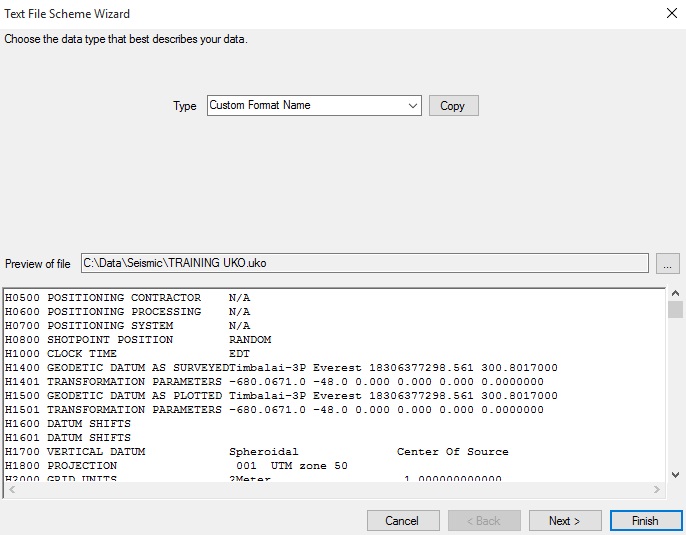
There are several ways to create a custom Seismic Survey format. A user may select Options>Seismic Survey Formats, or may click Add Format in the Seismic Survey Preferences form. Alternately, the user may choose to use a custom scheme when loading a file into a Seismic Survey Conversion job. In all cases, the Text File Scheme Wizard will be displayed.

Select one of the existing Format Types as a starting place, then click Copy to create a copy. This will replace the Type combo box with a blank editable field where the user may enter a name for the new custom format.

If there is not already a Preview file loaded, click Browse (...) to select one of the appropriate type.
When the wizard is launched from within a Seismic Survey Conversion job, the Preview of file field will be populated with the input file being loaded. Additionally, the user may skip the step of making a Copy, and may instead directly alter the schema for one of the base Formats. In this case, however, the customized format will only be used to load the current file this one time, and will not be saved for future use.
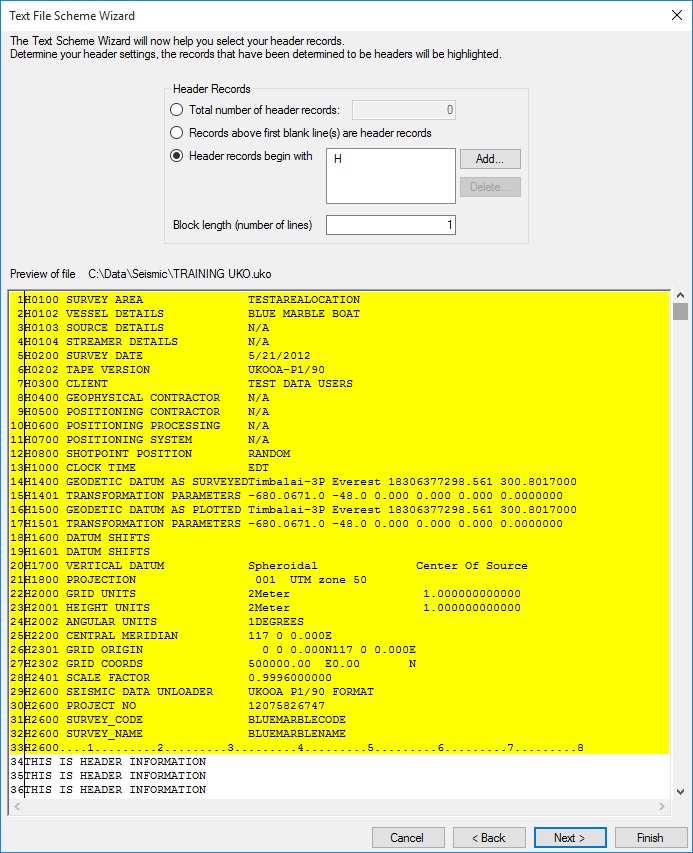
Once a file has been selected for preview, the user may click Next to proceed. The next window in the Text File Scheme Wizard allows you to specify how header records are defined. The radio buttons will specify how to identify the header records, and the "Block Length" allows users to define a length of rows after the identified headers which are also Header records. For example, below we have an example of a header scheme which indicates the first row by the letter H, where the header block is 20 lines long (this includes the first row containing the H).

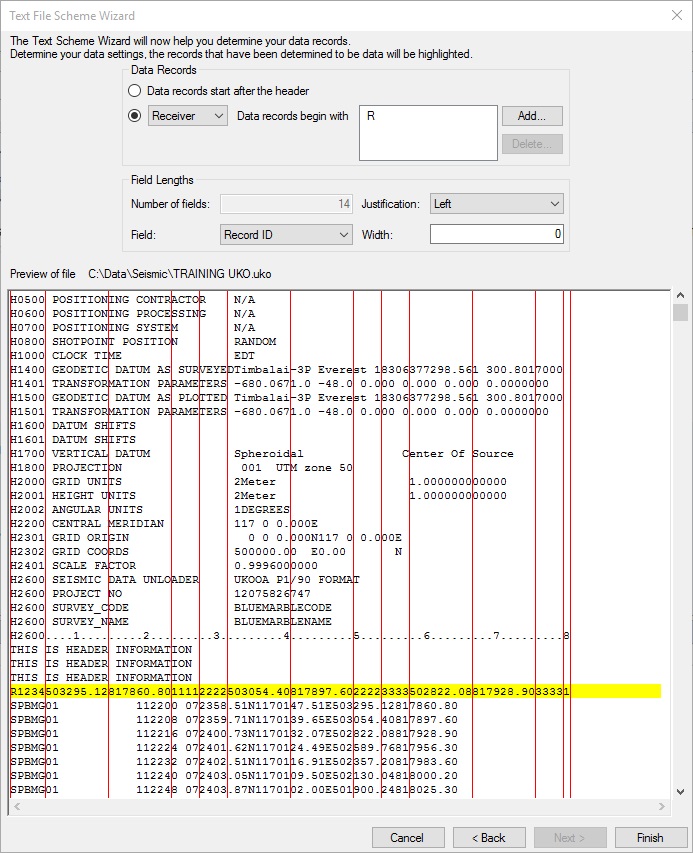
Clicking Next will advance to the next window. Here users may specify how the data records are formatted. In the Data Records section, selecting the second radio button will allow users to specify the indicating characters for rows containing either Shotpoint or Receiver data.The Field Lengths section allows users to change the justification and width of each column.Alternatively, users are able to click and drag the red lines in the preview tab to manually change the width of the lines’ associated columns.

Once all changes are complete, the user may click Finish to proceed.
The user may also Cancel at any time, to throw away the current Format changes.