World Wind Tiles
The Export World Wind Tiles command allows the user to export any loaded data to JPG or PNG files tiled in the configuration required by NASA's World Wind application. This command will create both the image tiles and the XML file required for World Wind to use the data. You should place the generated .xml file in the Config\Earth folder under your World Wind installation folder in order for it to be picked up by World Wind.
When you select the command, the World Wind Export Options dialog (pictured below) appears allowing you to setup the export. This dialog allows you to specify the display name of the map set in World Wind, the base directory to which the directory tree of map tiles will be exported, the zoom level setup, the format of the imagery, and some additional options. There is also an Export Bounds panel which allows the user to set up the portion of the loaded data they wish to export.
If you want to create a new terrain layer to update the base terrain in WorldWind rather than just creating a new image layer to drape on the existing terrain, choose the BIL format export.
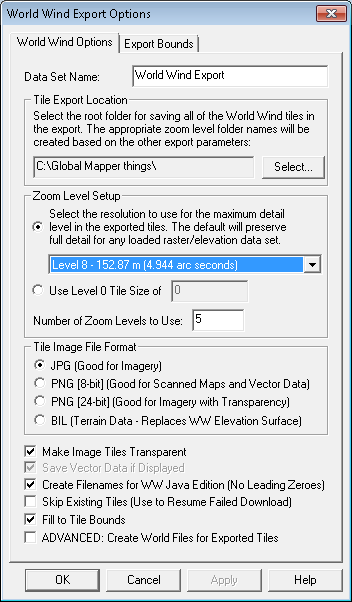
Use the Tile Export Location to
specify the directory location exported tiles should be generated to.
The Zoom Level Setup can be used
to set the resolution and the maximum level of detail for exported tiles.
By default, the export will preserve the full detail for loaded raster/elevation
data set. Supported Tile Image Formats are: JPG, PNG (8-bit), PNG (24-bit)
and BIL (for Terrain Data).
Use the Fill to Tile Bounds option
to set export behavior to where every tile is filled, and the crop area
is used solely to determine the bounding box. If this option is not selected,
the crop area bounds will be observed and the tiles will not include data
outside the specified export bounds/crop area.
Note: Users without a permanent registration key that export World Wind tiles will get a large diagonal DEMO symbol across the image. Registered users will not see that symbol on their output.