Datasource Audit Trail
The Datasource Audit Trail allows users to maintain a complete log of any modification to the current geodetic datasource. This can be used as a quality management tool for geodesists, as well as a simple change tracking log for most users. The Audit Trail can also provide insight when transformation results differ from previously converted data.
The Datasource Audit Trail logs all changes to the geodetic datasource when they are made. This includes changes imported from the GeoCalc Online Registry. When an updated datasource is saved and written out as an XML file, the change log is likewise written out as an XCH file. Changes to the custom datasource are stored and tracked separately from changes to the base datasource. If you are using geodata.xml as your base datasource and custom.xml to store custom data, the base changes will be logged in
The Datasource Audit Trail also tracks changes that have not yet been saved out to file. These are referred to as "Uncommitted" changes. When the Geographic Calculator Application is run, and the datasource is loaded, any matching Audit Trail files listing previous changes will also be loaded.
To display Audit Trail information, go to Datasource>Display Audit Trail to open the Audit Trail Viewer dialog. If there are no logged changes to the datasource, a message will display stating this and no dialog will display.
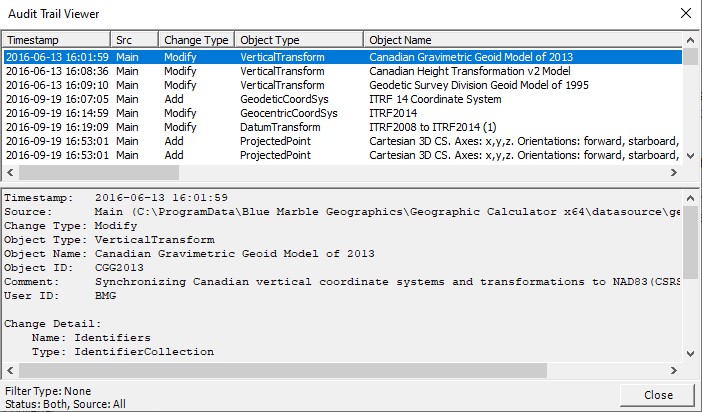
The Audit Trail Viewer dialog displays each of the logged changes to the datasource in the upper panel, along with other information including the time the change was logged, which datasource was changed (base or custom), the Windows User ID making the change, the type of change, the type of object changed, and the name of the object at the end of the change. Selecting one of these changes will display more details about the data in the panel below, including the values before and after the change.
Changes to geodetic data are logged as one of three types: Add, Modify, and Remove. Until the datasource is actually saved, modifications to a given object will be “stacked” together. So when the datasource is finally saved, only a single “Modification” change will be recorded.
In the example above, the details of the addition of a new datum transformation are being displayed.
Right-clicking on the upper panel of the Audit Trail Viewer dialog will give you several options: View Object, Apply Filter to List, and Clear Filter.
Selecting View Object will bring up a viewer to display the object details (they may not be edited). If the object has been deleted, no details will display.
Selecting Apply Filter to List will bring up a dialog to allow you to filter the change log details.

You may set up a filter to view only changes to objects of a certain type, or only changes made during a certain time frame, etc. If you filter for "Only Committed" changes, you will see only the changes that have actually been saved out to the XML datasource file. If you filter for "Only Uncommitted" changes, you will see only the changes that are "current" and have not yet been saved out to the XML datasource. You may also filter for only custom changes, or only changes to the base datasource. Generally speaking, the latter will be changes made by Blue Marble Geographics as part of upgrades.
Selecting Clear Filter will remove any filters on the Audit Trail Viewer and will display all logged changes.
Right-clicking on the lower panel of the Audit Trail Viewer dialog will give you several options: Copy, Save to File, Print and Font.
Selecting Copy will put the currently displayed change details onto the clipboard, so they may be pasted into another application.
Selecting Save to File will bring up a dialog to allow you to specify an output file for saving the current detail information. Only the current detail (the information in the lower panel) will be saved out, not the entire log.
Selecting Print will bring up a printer dialog to allow you to chose a printer and complete a printing of the current detail. Only the current detail (the information in the lower panel) will be printed out, not the entire log.
Selecting Font will bring up a font selection dialog to allow you to change the display font for the details.