Non-rectangular Crops
When transforming a raster layer in the Geographic Calculator, you can specify a crop area for each input image. In the case of the single transformation, the crop will determine which portion of the input image will be used to create the output image. This is an easy way to target small areas of interest or quickly reduce large datasets into more manageable pieces. The crop area will allow you to use non-square join lines, such as geographic landmarks (rivers, roads, etc). This will result in a more natural looking, higher quality output dataset.
Transforming a single image with non-rectangular crops
To apply a crop area to a single raster image during transformation, select an active raster data job from the project manager pane (or create a new one). Click on the Set Transform Area button in the lower right corner. This will launch a Transformation Area dialog, with a preview of your raster image data. The crop area can be defined by a simple rectangle, a complex arbitrary polygon, or you can load a predefined area from a vector file.
 Polygon
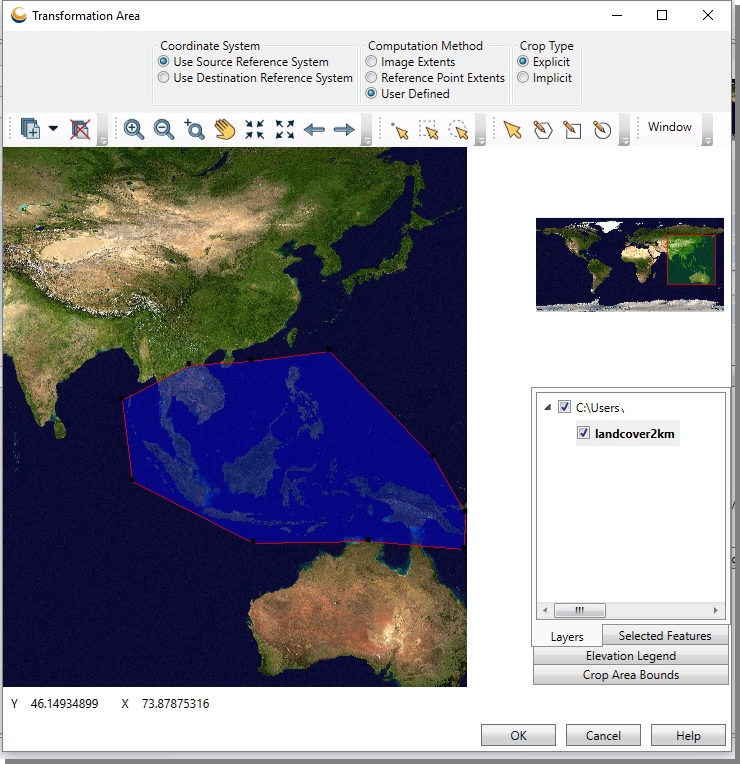
For the arbitrary user-defined polygon, select the Define Polygon Crop Area tool in the toolbar. When you move the cursor over the image preview area, you will notice that it now looks like a pencil. A single left mouse click will start your polygon draw. When you have completed your custom area, double click the left mouse button and the polygon will close. You should now see your area surrounded by a red polygon. The nodes of the polygon can be modified with a simple click and drag of the mouse.
 Ellipsoidal
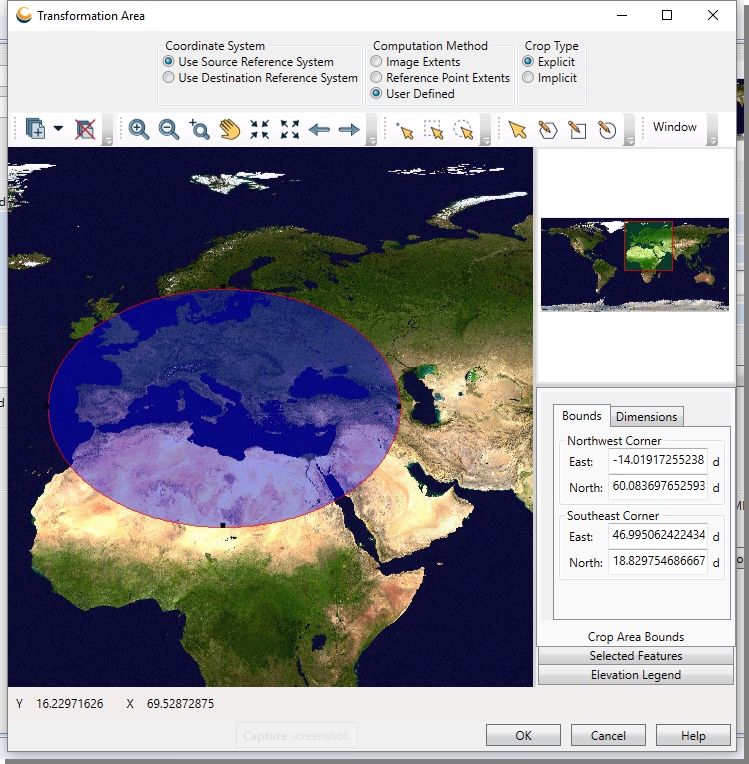
You may also select the Define Ellipsoidal
Crop Area tool in the toolbar ![]() . When
you move the cursor over the image preview area, you will notice that
it now looks like a pencil. Click
the left mouse button and drag to start your polygon draw. You
should see a red ellipsoid that will shrink and grow as you move the mouse. When the ellipsoid is the desired
shape, release the mouse button. The size of the ellipsoid can
be modified by dragging the borders with the mouse.
. When
you move the cursor over the image preview area, you will notice that
it now looks like a pencil. Click
the left mouse button and drag to start your polygon draw. You
should see a red ellipsoid that will shrink and grow as you move the mouse. When the ellipsoid is the desired
shape, release the mouse button. The size of the ellipsoid can
be modified by dragging the borders with the mouse.
 Existing Vector
To use a predefined vector layer as a base for the crop, you will need
a dataset that is in the same coordinate system as your georeferenced
raster image. Select
the ![]() Load Data
tool from the toolbar, and load your area polygon dataset. In
order to use this crop feature the vector layer must contain simple polygons.
Once your dataset is loaded, select the Select
with Point tool from the toolbar. Click
on the polygon that you would like to use as your crop. It should flash
briefly to indicate selection. Then,
in the Selected Features display, right-click on the selected feature
and select Use
as Crop Area.
Load Data
tool from the toolbar, and load your area polygon dataset. In
order to use this crop feature the vector layer must contain simple polygons.
Once your dataset is loaded, select the Select
with Point tool from the toolbar. Click
on the polygon that you would like to use as your crop. It should flash
briefly to indicate selection. Then,
in the Selected Features display, right-click on the selected feature
and select Use
as Crop Area.

This will create a crop based on the specified polygon. Corner points can be modified with a simple click and drag of the mouse.
Once the polygon is selected, click the OK button on the dialog. This area is now saved as part of the transform job, and can be modified whenever necessary.