 Batch Raster Transform
The Geographic Calculator gives you the ability to generate a batch of Transform jobs for reprojecting a large number of georeferenced image files. This functionality can be used to process large datasets with minimal user interaction.
Before creating a batch of transform jobs, you should set up a single transformation of a representative file. To be certain that all of the job settings are correct, it is recommended that you process this single job and verify that your output file is in the format and coordinate system that you expect.
To generate a batch from a pre-defined raster transform, right-click on the target job in the Project Manager pane of the application, and select the Batch Add option. This will bring up a dialog titled Transform Job Generation.
![]()
-
Add Data button: This will launch a file browse dialog, allowing you to select any input image files for the batch. Each image will require a georeference file, and you will be prompted to select the reference file as the images are added to the list. Once the files have been selected, they will be stored in the list box to the right of this button.
-
Select File / Directory : Switch the drop down to directory, then press the Add Data button. This will launch a browse for folder dialog, allowing you to select any directory of input image files for the batch. The individual files in that folder will be added to the list box to the right of this button.
-
Remove button: This removes the selected item(s) from the list box on the right hand side of the "Transform Job Generation" dialog.
-
Hide File Path checkbox: If this option is selected, the path on disk for each file will be excluded, leaving only the full filename in the list box.
-
Output File Folder: The location where the resulting images from each reprojection will be saved.
-
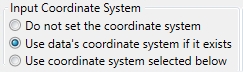
Input Coordinate System: If the coordinate systems are defined in the input files, select Use the coordinate system from the reference file, if it exists. In this case, you may have to select datum transformations for individual jobs in the batch. If all of the input images have the same coordinate system, you can select Use coordinate system selected below.
- Coordinate Transformation: This section provides options for automatically setting a coordinate transformation. If all of the jobs will use the same coordinate transformation, this can be set in the Generate Raster Transforms window. Validation will check to make sure the selected transformation is appropriate to the data. It will also make sure the input data exists, and that the output file is writeable.
- Output Coordinate System: Specify the target coordinate system for the job. This can be set so that all jobs use the same system as the file source, or so that all jobs use the same defined output. If each job will use a different system, this can also be set to Do not set the coordinate system, and then specified individually on each generated job.
-
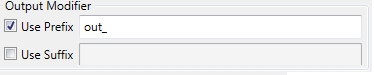
Output Modifier: The text specified in this area will be applied to the beginning or end of the input filename. This generated name will be used for the output file of each reprojection.
-
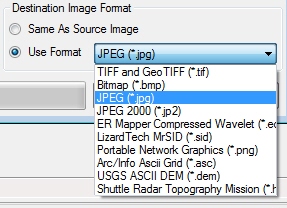
Destination Image Format: This can either be set to match the input image, or a new format will be used for all image reprojections in the batch.
Once all parameters have been filled out, clicking the Generate button will create a Batch Raster Transform with a separate job for each of the input files. Clicking on any transform job in the Project Manager will open that job to give you a full description of the single image transformation. Settings for each transformation can be customized after the batch has been generated.
Once all transformation jobs are complete, right-click on the Batch Raster Transform in the Project Manager and select Process. The progress of the jobs in the batch will be shown in the Project Manager window.